Business Intelligence
This guide has the goal of showing you how to make a data integration using LinkApi's platform, so you can have an analytical view of important metrics for your business.
We will use as an example, Bling as our ERP and Pipedrive as our CRM. It's worth mentioning that their documentation will provide information like the API key, authentication type and Base URL.
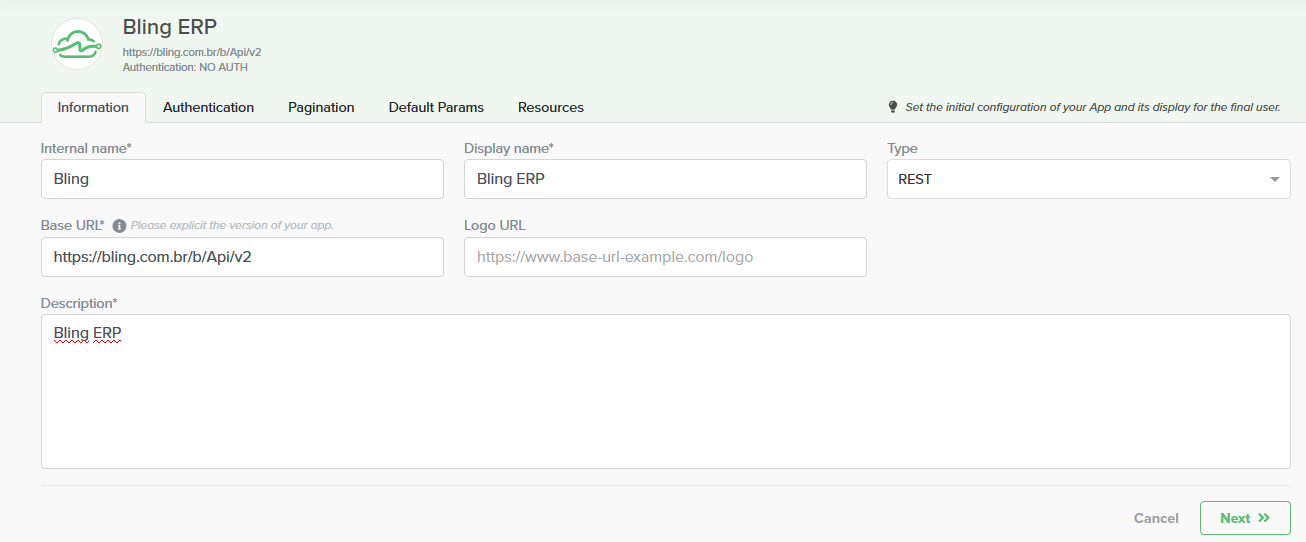
Our first step is building Bling's Component in LinkApi's platform. On your Build menu, go to Packages and select Build Component, so you can start the initial setting of your Component:
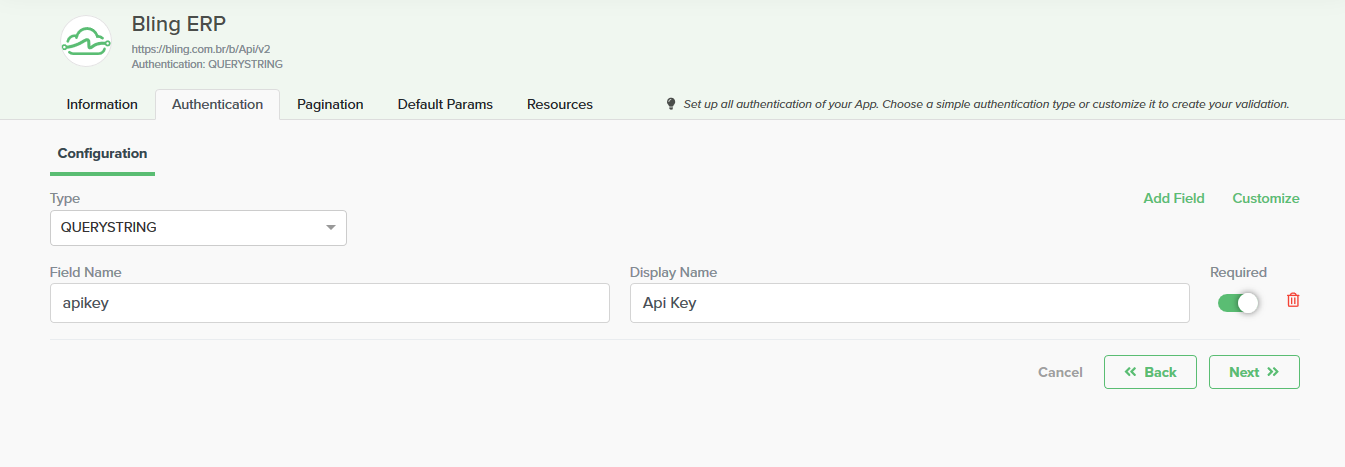
The second step is about the authentication setting from this API. In Bling's case, they use Querystring auth, as informed by their documentation:
The third step is filling information about the Resources, which are the information we wish to receive from the API. In our example, we will need data about the accounts receivable. On Bling's documentation, they show what endpoint you should choose to get this, which is contasareceber. Having that, fill the fields about the URL and which type of method you need, then click on Add Resource. For our goal, we should use get.
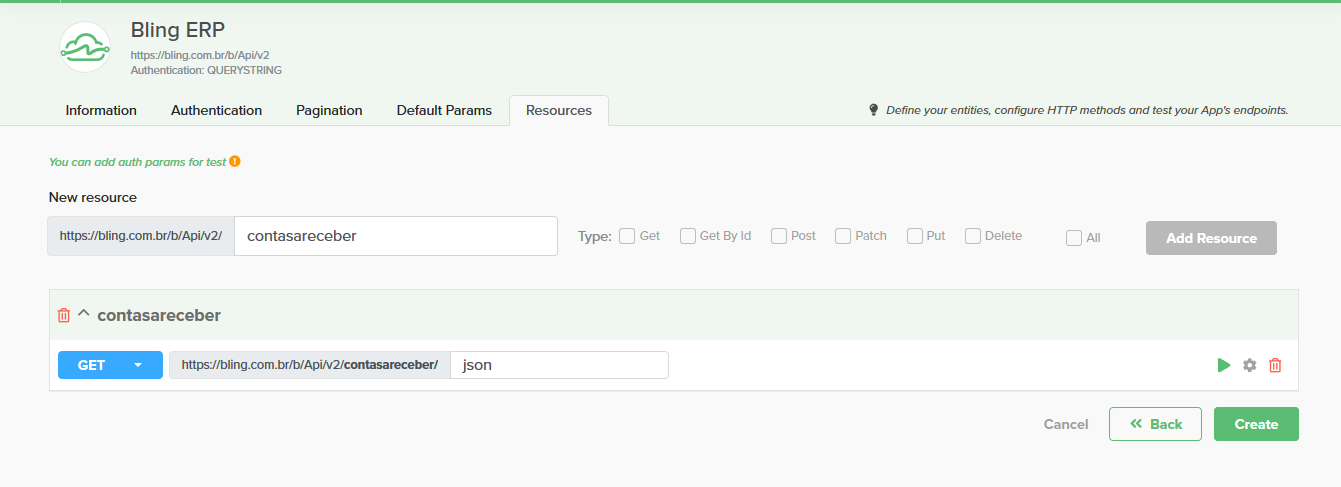
In order to test the Component, we must inform the token defined on the authentication tab, so, we insert these credentials clicking on the test button (the "play" sign, or clicking on the message You can add auth params for test).
Our platform links the Base URL in JSON with Bling's API Key. When you test it, you'll find the information presented on arrays level on the lower left side of the page.
It's worth mentioning that in this example, we'll only use our Accounts Receivable resource, but the platform is flexible enough so you can use as much as you need for your projects' goals.
To end the Component creation, we'll have to convert our JSON generated code to a table, using the Response tab. On this step, select the field that contains the unique information, which is the ID field on our case. Having that made, just finish it by clicking on Create Component.
To create Pipedrive's (or other) Component, you should follow the same logic, using their documentation as a reference as well.
With both Components created, the next step is building another Component that will serve us as a Data Warehouse, so we can consume data from Bling (accounts receivable) and from Pipedrive (the deals), in a MongoDB database.
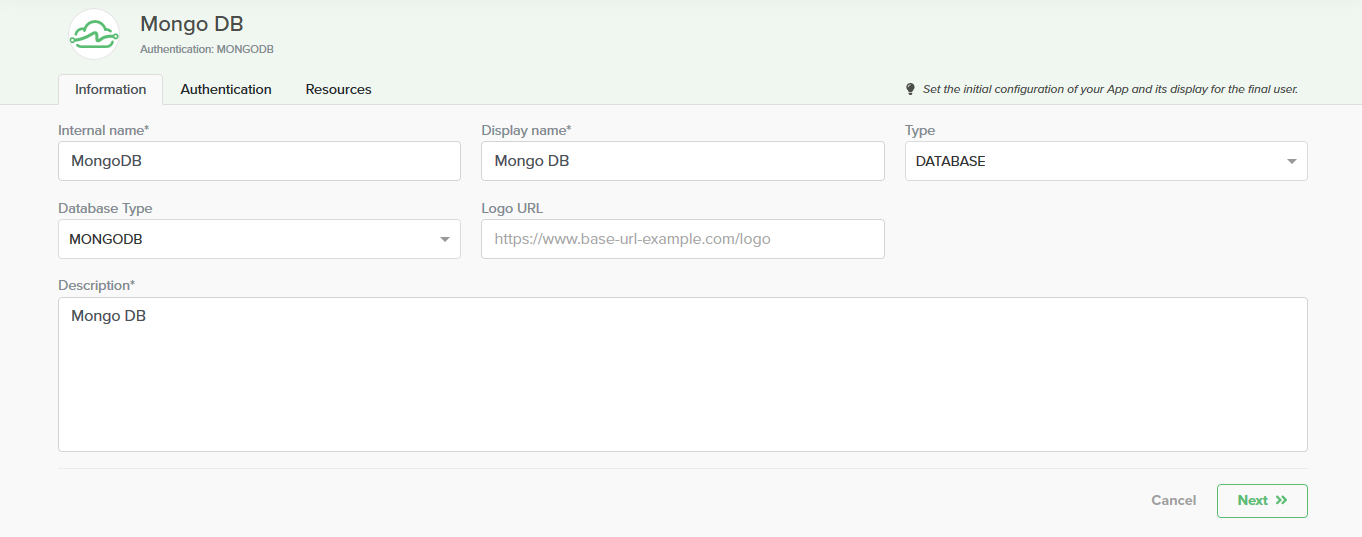
Just like the previous steps, you should go to Packages and click on Build Component and start setting up the database. Note that you have to set the type of Component as Database, and specify which one is it:
MongoDB's authentication is uri, by default. So we don't need to change any settings on this tab.
On the Resources tab, we'll specify which data are going to be inserted on the database. On our example, we'll use Pipedrive's deals and the receivables from Bling. For both, we'll use the post action.
MongoDB's authentication is uri, by default. So we don't need to change any settings on this tab.
On the Resources tab, we'll specify which data are going to be inserted on the database. On our example, we'll use Pipedrive's deals and the receivables from Bling. For both, we'll use the post action.
With the three Components created, the next step is creating a new Automation, to link the three Component.
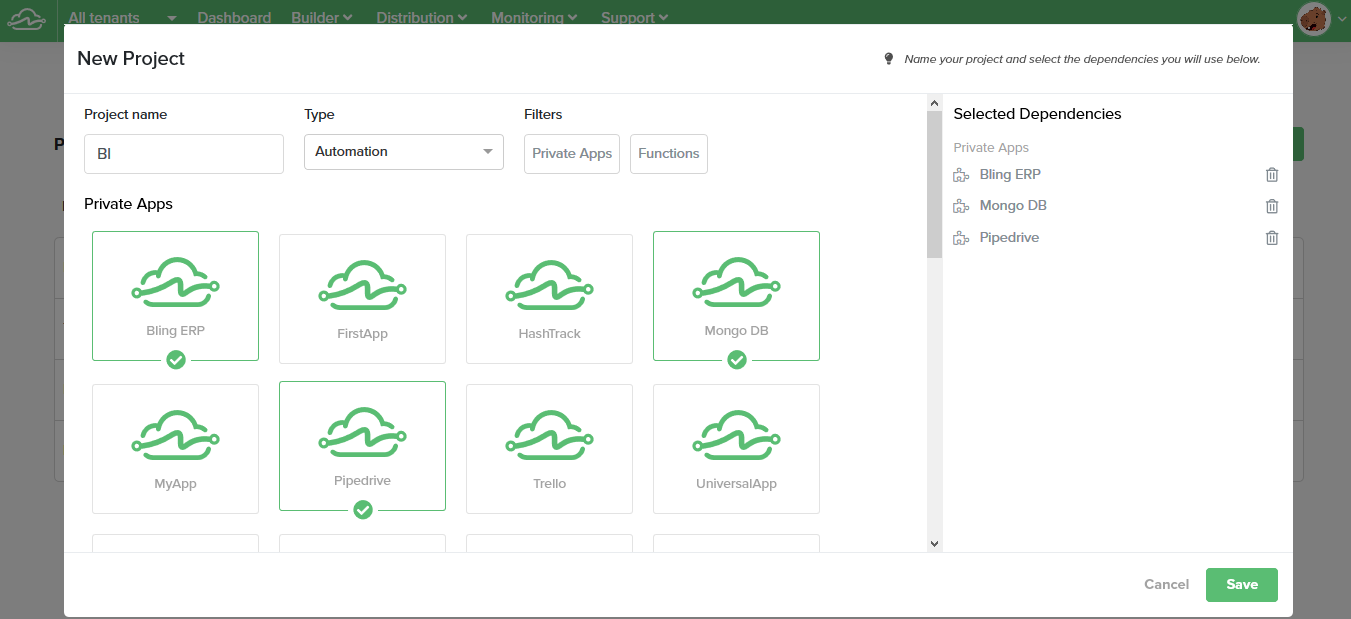
On the Build menu, select Automations, then click on New Automation. This step requires you to choose which Components are going to be used and a name for your project. You can end this step clicking on save.
-
- Having the project created, now we should set the required automation, that for this example are the deals and the ERP information. On the automation menu, there is an editable example, and we'll use that to configure our first one. We'll name it syncDeals, and it will be the one responsible for fetching deals' data on Pipedrive.
To configure it, you can use the code snippet that's in the lower left menu, and paste it below the indicated line (your beautiful code hoes here).
-
- Still in syncDeals automation, we now have to iterate the results and insert them in MongoDB. On the snippets menu (upper right of your screen), select the *Parallel function and paste the snippet below the previous one.
It's important to be aware of the Components particularities for each one of them. For Bling's information, the id is a propriety within the entity for Accounts Receivable. Therefore, we'll need to specify the uniqueKey as contaReceber.id
With the automation built and set, save the project and proceed to the Jobs creation.
For the goal we have, we need to set up two different Jobs - one for the deals and another one for the accounts. Remember to set the Jobs frequency. In our example, we'll activate it every 12 hours.
With all the configuration done, we can start the sync process to MongoDB. Activate the jobs execution, and if needed, check the generated activity logs. With that, your database should already receive the desired data, and Metabase will be updated.
Updated over 6 years ago
