How to create a ticket inside LinkApi
Looking for improvements in every step of our experience, we have updated the experience on how to create and follow up tickets inside our platform in partnership with Atlassian. This article will show the step-by-step on how to create tickets inside LinkApi.
Attention
Create tickets to get help only with LinkApi features and pages. If you need help with other APIs, authentication and connections, we recommend contacting directly the desired company.

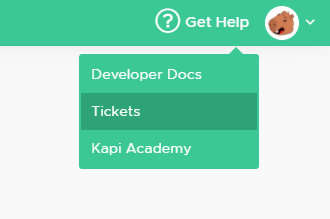
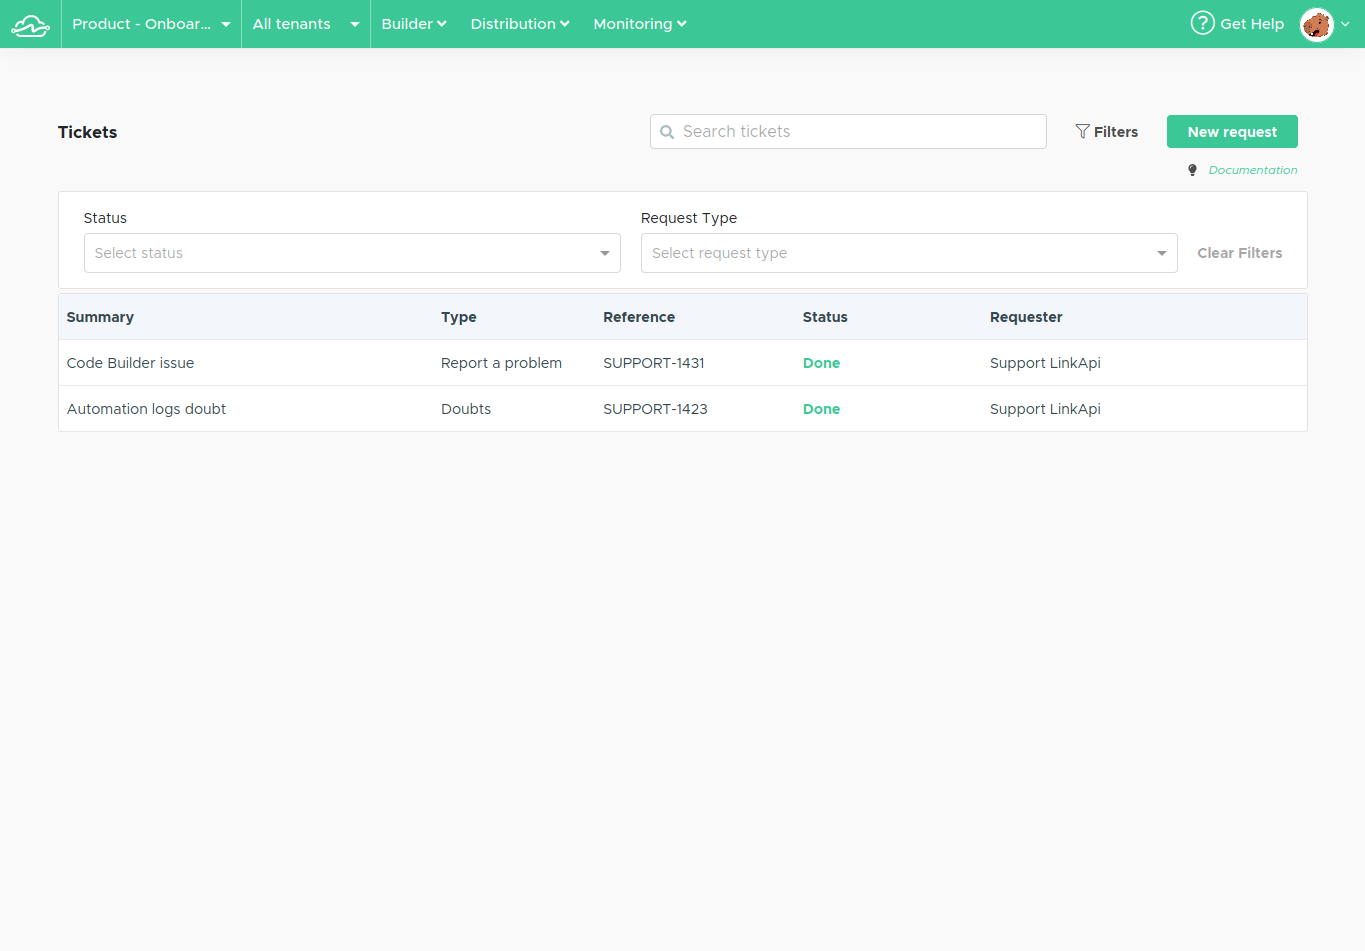
First of all, click on the Get help menu and go to Tickets. You'll be redirected to company's ticket list page like the one below:

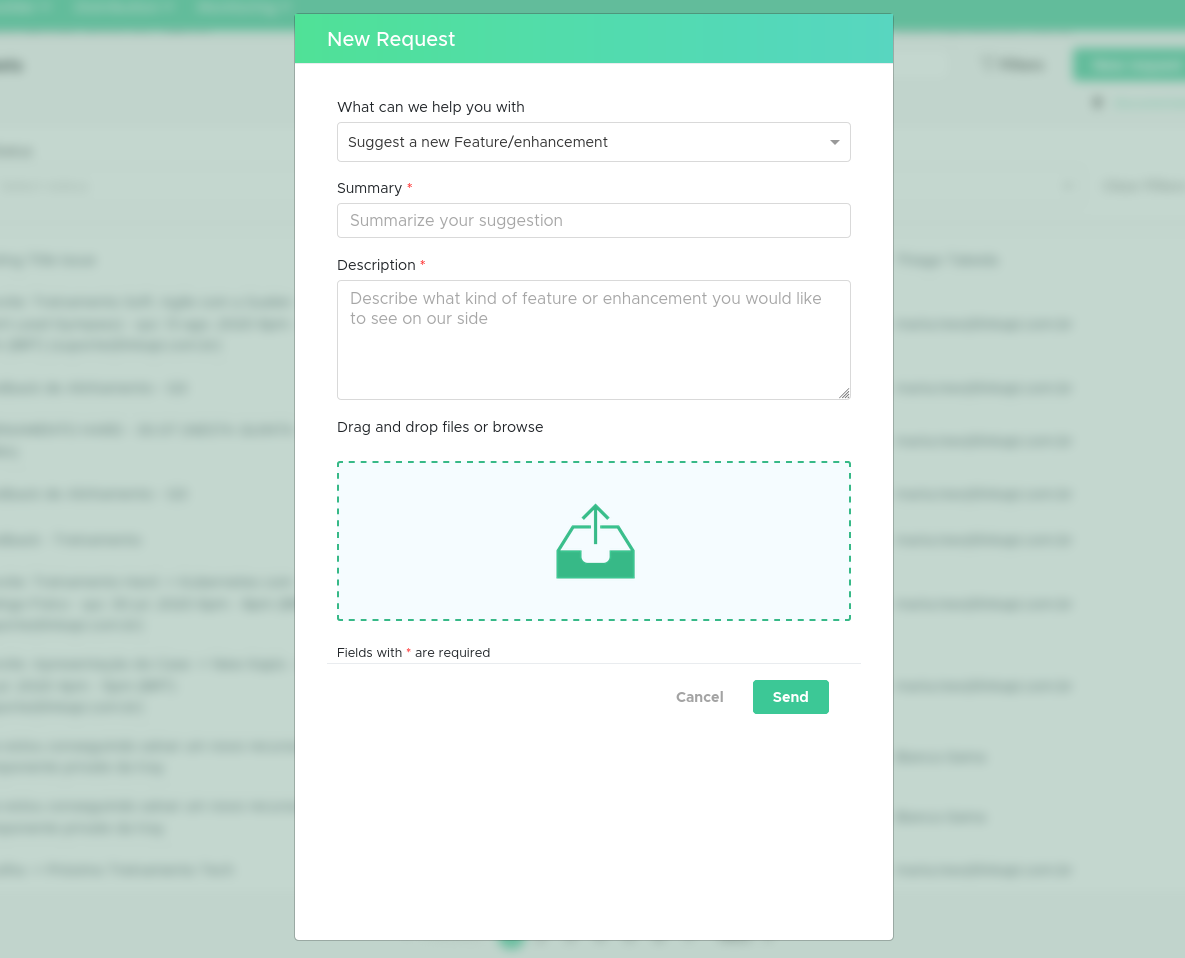
Here is where you can create tickets. You simply click the button "New request" to open the creation modal. There you can select a category from Suggestion, Report a problem and Doubts. Choose either one and start describing your request.

Fill the fields above with the information you need help with. Make sure to be clear and direct in the subject when describing your problem. You can also upload screenshots to help. Just hit send when you're ready.
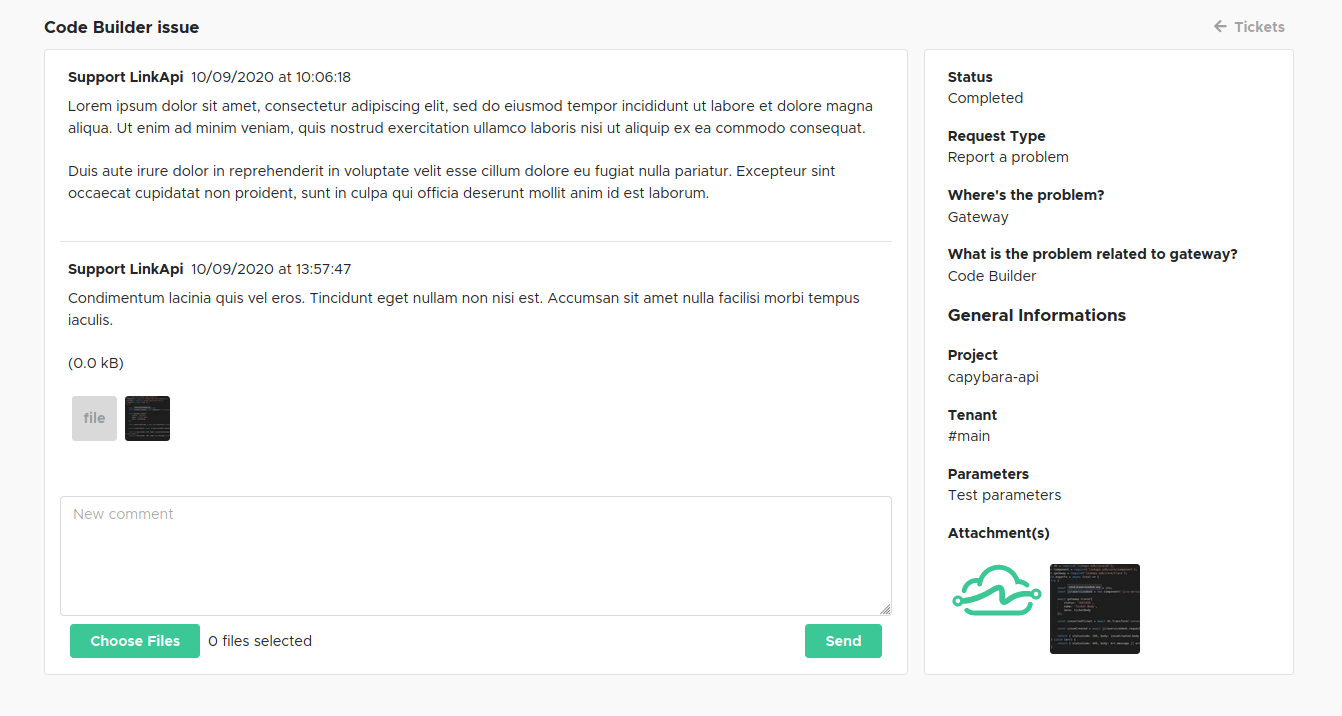
After sending your request you will be taken back to the tickets list page and your newest ticket will be there along with any previous requests. Click on the ticket row to go to see its details and comments.

On the ticket details page you will see all the initial request information and be able to follow along to responses like seen above. Use this page to reply and send new attachments if necessary. You will also receive email notifications when one of our agents responds your request.
Viewing older tickets opened through Jira Service Desk
If you previously sent requests to our support team using Jira Service Desk you will still be able to see these requests on your tickets list. Differently than requests opened through our platform, you will be redirected to the request's page on Jira when clicking to visualize its details.
We hope you liked our new tickets page!
Have any feedback or suggestions? Why don't you try creating a ticket with your submission? ;)
Updated over 5 years ago
