SaaS
Here, we'll explain the process of making an integration between two different SaaS. Our examples are Xtech, an e-commerce platform and Agendor, a CRM.
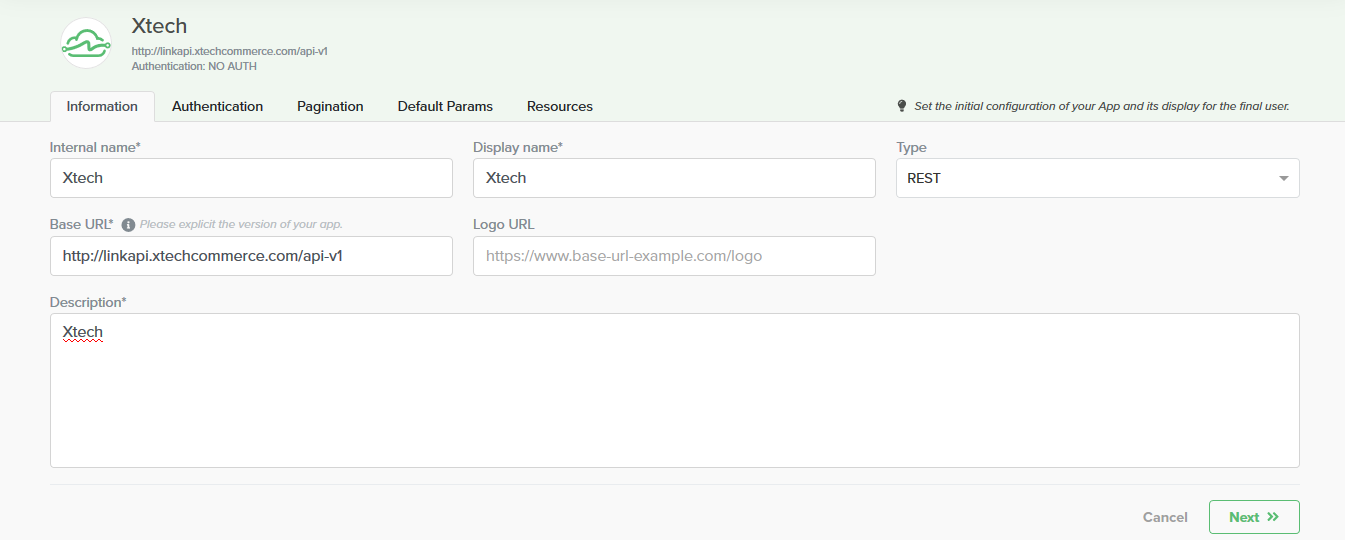
Our first step is creating Xtech's Component in order to consume their API. Their documentation provides us information about the Base URL, API type and authentication.
-
- On your build menu, select Packages, then Build Component and proceed to the initial Component's settings.
-
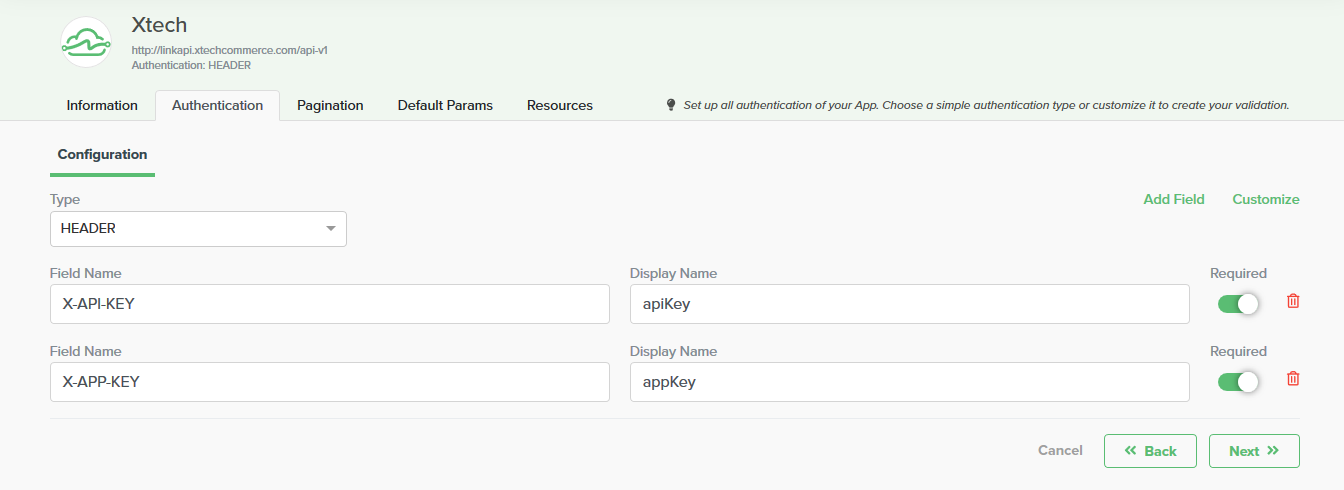
- Xtech's documentation tells us that their authentication type is a header one, with 2 fields. So, we specify the names "X-API-KEY" and "X-APP-KEY".
-
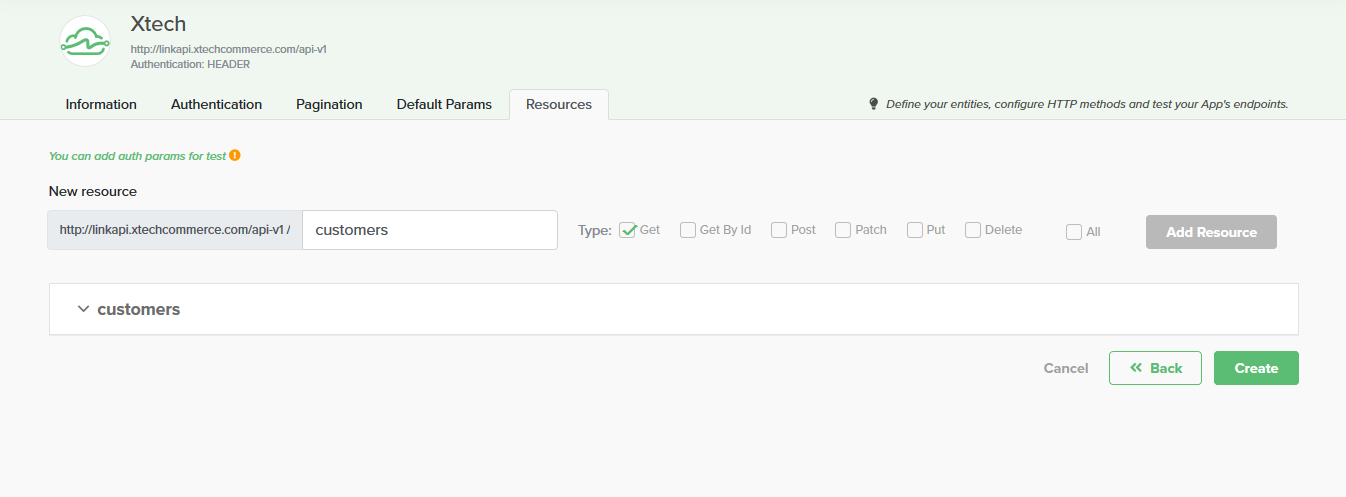
- As long as Xtech doesn't require any default parameters to make requests, we can leave these fields on this tab empty and proceed to the Resources tab. On our example, we will only need to consume information about customers, so, following their docs, we can fill the url with /customers, selecting the get method.
-
- In order to test this endpoint, fill the apiKey on set credentials, so we can assure that the request is being returned with the right data. Having that done, we finish this step by clicking on Create.
For Agendor's Component, we just need to clone it from the Pre-Built Components section to a private Component. It's always nice reviewing if the settings and resources are appropriate for what you need. You can customize the Component in its private version on your catalog, though.
Now, we can move on to our Project creation.
-
- To do it, select Projects on your Builder menu, then click on New Project. This step requires you to select which dependencies are going to be consumed, which on our case, is Agendor and Xtech. Click save after selecting them.
-
- On the automation menu, there is an editable example which we'll work on. We'll name it sendCustomersToAgendor, therefore, the responsible one for executing the get method on Xtech. To configure it, you can copy the snippet that's in Xtech's folder, on your lower left menu, and paste it on the indicated area (Your beautiful code goes here)
-
- To work with clients' array, on the snippets menu located at your upper right, copy the snippet from the parallel function and paste it below the previous one.
-
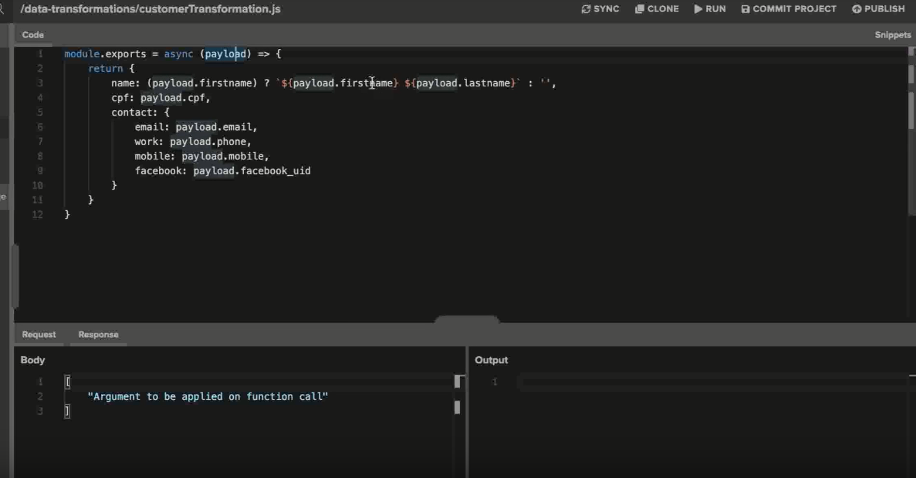
- Now, we have to "transform" our Xtech client to Agendor's pattern. To do it, we'll use the data-transformation method, that's located automation the automations. We can name it as clientsTransformation. For that, we'll have to transform Xtech's payload to Agendor. Their documentation tells us how to do it, so in our example, these are the changes:
-
- With these changes done, you can copy this code's snippet to insert it on the automation in the indicated area (Do your logic here). Change the initial parameter for item, and the result will be the formatted client, so it should follow this:
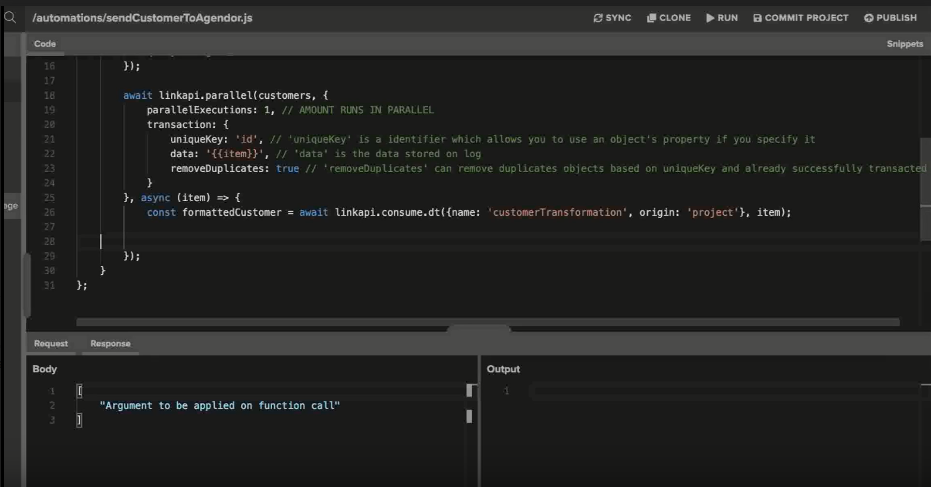
-
- We'll use the trace method's snippet, and we can change data by formattedCustomer, accordingly to what was done on the previous step. This is optional but recommended if you need visibility on what is going on within the processes.
Having all of that done, we finish this automation setting, and we can proceed to the same step-by-step to Agendor's Component, using the post snippet. This way, our integration is done and the only missing step is the creation of the Jobs. Remember to click on Commit Project by the end of the process.
On your jobs menu, create a new one and fill the fields with their matching information. On our example, this is how it should look like:
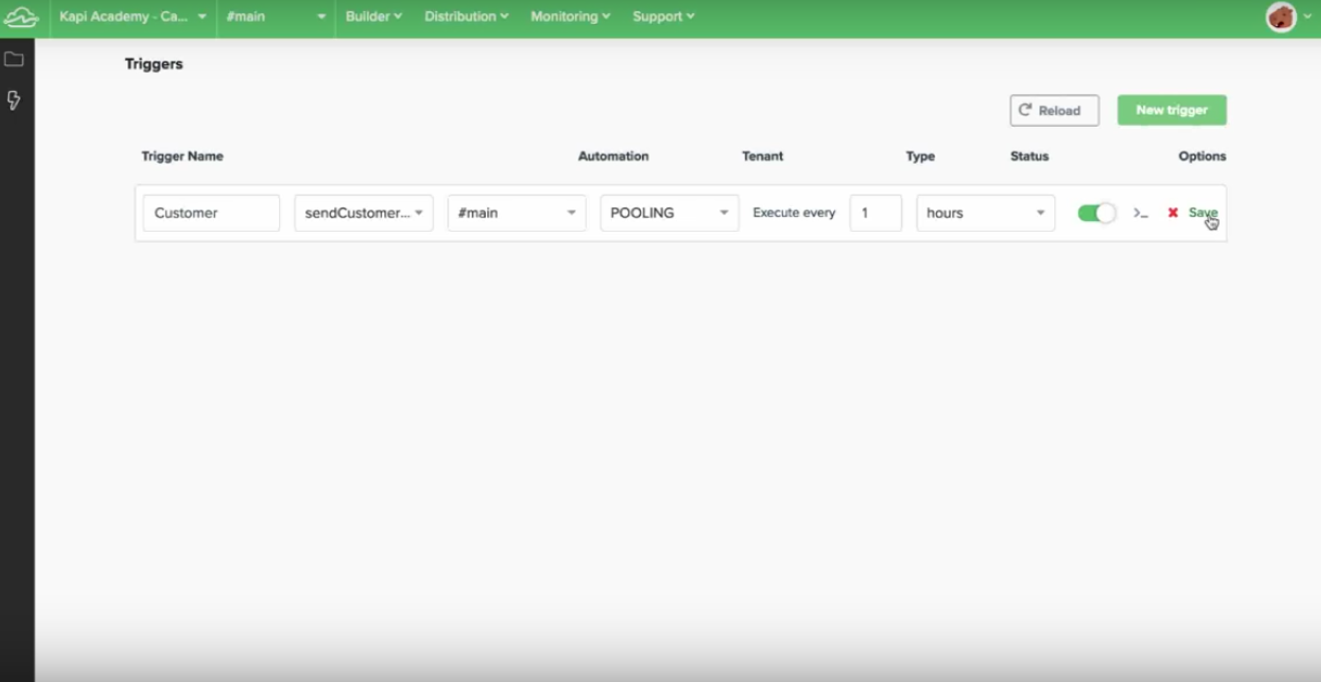
By activating it, you can read the activity logs to make sure the information is right. Now, the changes are already visible on your destination platform, in this case, Agendor.
Updated over 6 years ago
