Data Migration
This guide will show how to migrate data from one Component to another. A common scenario when a company is changing some software, like a CRM or an ERP, for instance.
Here, we will use two CRMs, Pipedrive and Agendor. Both of them are already available in the Pre-Built Components, so adding them as Dependency is enough to move on.
For our example, the required endpoint (persons) is already set, but if you need another one on your context, you should just clone the Component and add the needed endpoint.
Now, we have to create a new Automation:
On the Build menu, select Projects then proceed to New Project, on this step, you'll choose which Component are going to be used, as well as this project's name. You can end this step by saving it after selecting the above.
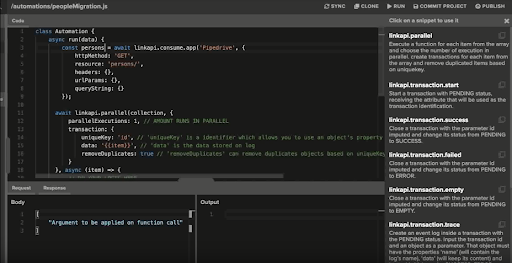
The first step is setting your automation. On the automations menu, there is an editable one. We'll call ours peopleMigration, and it will be responsible for fetching information on Pipedrive.
To set it, you can copy the code from the persons-get snippet, on your lower left, and paste it below the noted area (Your beautiful code goes here).
Now, we need to transform Pipedrive's data to use them in Agendor. In order to do it, we'll use *Parallel function, and paste it below the previous lines of code.
In order to send data in their appropriate format, we can rename the "result" pattern to "persons", or another name that fit your needs in the project you're working on.

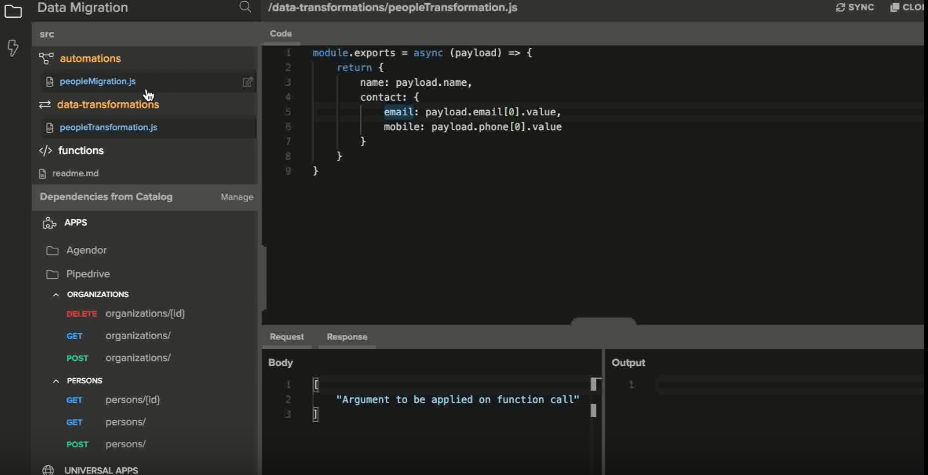
Agendor needs to "comprehend" data coming from Pipedrive, so we need to create a data transformation. To do it, rename the ready example (on data-transformations menu). On our case, we'll rename it to PeopleTransformation. To build it, it's necessary to specify which information we need, then set the payloads accordingly to our data destination.

After that, copy and paste this snippet in your automation on the designated area (*Do your logic here).
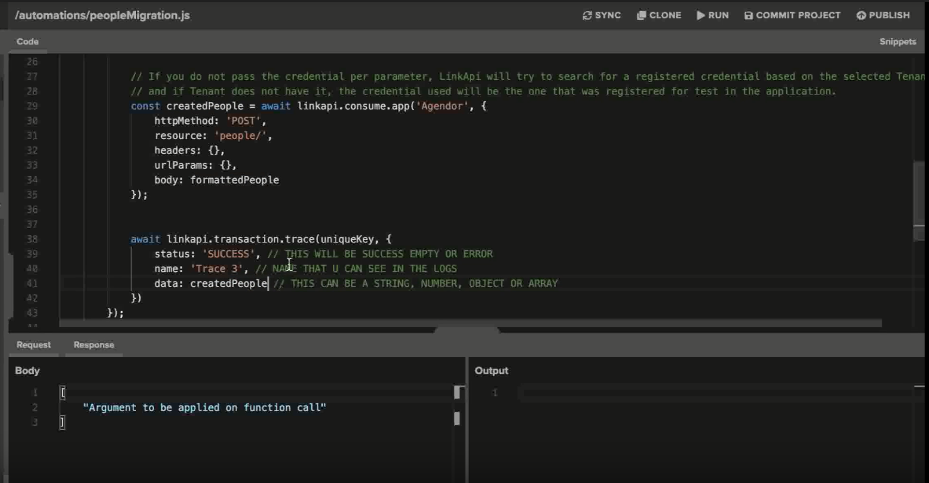
With our logic created, we now have to use traces to know which items were formatted. You can get this method on the snippets menu, on the upper right.
Now, to send information to Agendor, we'll paste the post function's snippet, located at the Component's menu. This snippet can be inserted below the previous trace. Also, you can use another trace on this part too.

With this, we concluded the project. Save it in Commit Project and proceed to the Jobs creation.
-
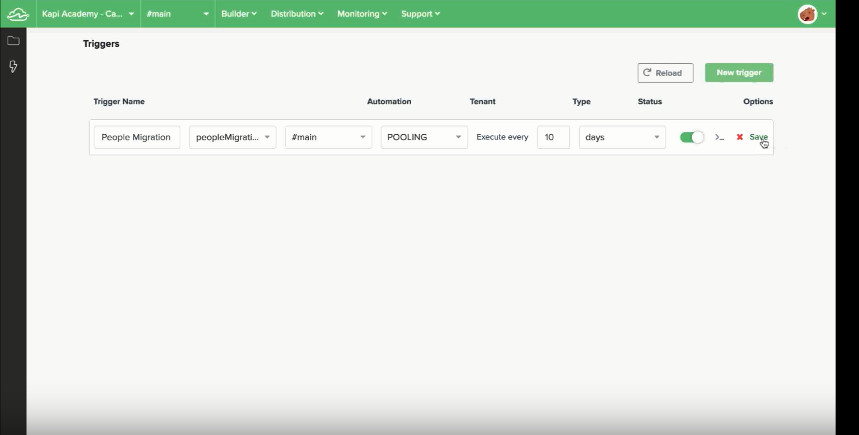
- On the Jobs menu, we will configure it so the automation can be executed and the information, migrated.
-
- Fill it with the matching automation (peopleMigration, in this case).
-
- Select which kind of job you need. In this case, we can set whatever interval we want to, because it will be a single migrating action.

After saving and executing this job, you can check the logs in Agendor, or on the Component you're using!
Updated over 6 years ago
