Creating a Private Component
Build your own endpoints rapidly the way you need
Components are “encapsulated” REST APIs, databases, Web Services and what else you need to connect when integrating or exposing APIs.
So, how should you create and set a new Component on LinkApi?
New Component and Component Info

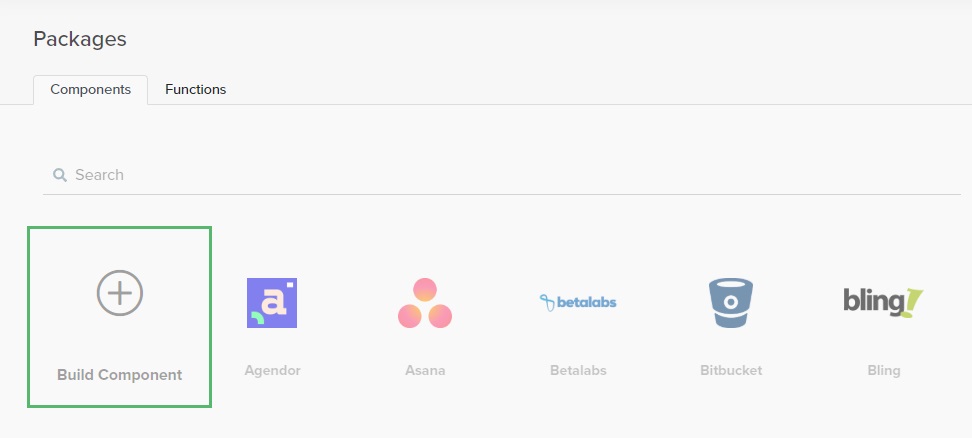
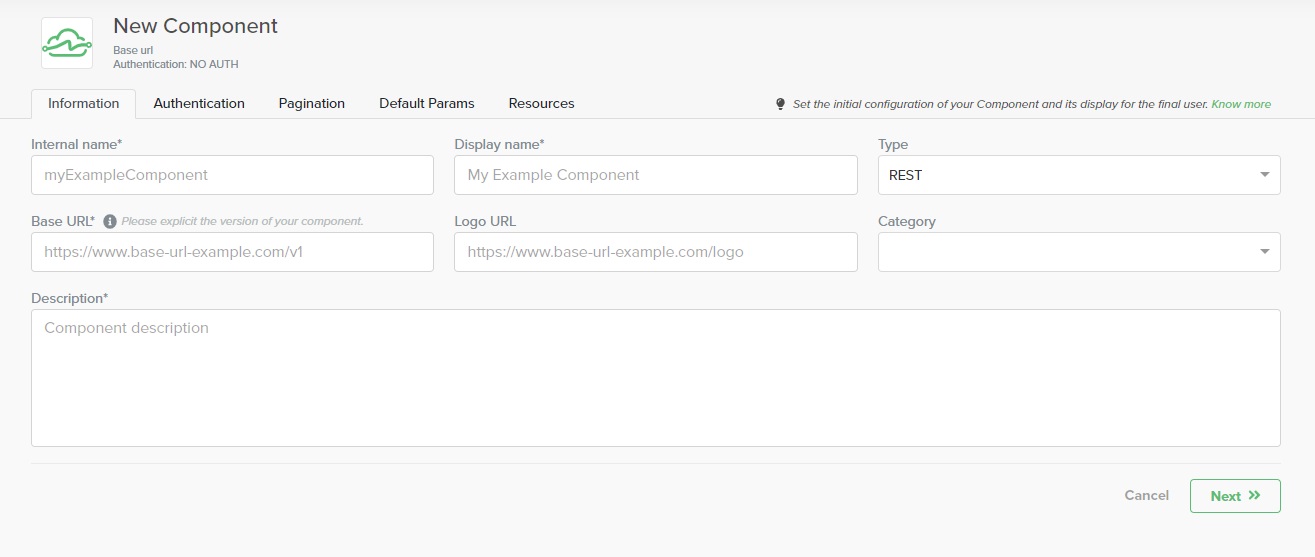
As a first step, in Packages, click on Build Component, and you’ll see the first fields that should be filled.

The internal name’s purpose is to label this Component when you use it in your project with an individual ID. As each API has its own peculiarities, we highly recommend consulting the documentation of the Component you’re building for information like the base URL, token/authentication, resource names and others.
| Component internal name | How your Component will be named inside the Catalog directory. Cannot contain spaces or special characters. |
| Display name | The official name of your Component. |
| Logo URL | Paste an image URL that represents your Component. |
| Component description | Describe your Component in a few worlds. This is how the world will see your Component, so make it comprehensible. |
| Base URL | Your Component's base URL that will be reflected in each Resource. You can explicit the version of your Component at the end, for example:https://www.base-url.com/v1This field also accepts custom authentication params inside the URL using braces, like that: https://www.base-url.{myECommerce}.com/v1 |
Authentication
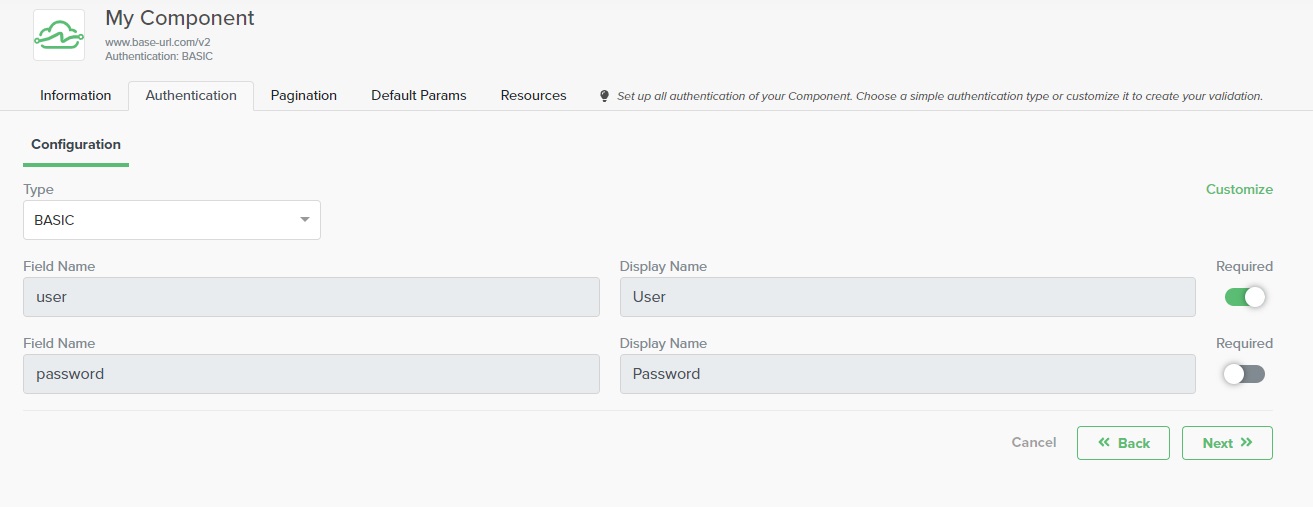
The second configuration tab is about Authentication types. So, whether it is a querystring, a header, a basic or a custom one, this is where you set them. Again, these are information that are found in the API's documentation. You can customize or add fields using the buttons on the upper right side, if necessary.

| Authentication Type | Description |
|---|---|
| BASIC | Basic authentication only requires Username and Password fields. |
| HEADER | Authentication params that need to be sent via header. |
| NO AUTH | Use it when your Component doesn't need an authentication login. |
| QUERYSTRING | Authentication params that need to be sent via querystring. |
| OAUTH2 | Authentication model that allows the user to give access to their data without exposing their password. For example: Facebook login. More info about OAUTH2 Components. |
| CUSTOM | Create any fields your Component requires and customize its code. This authentication type will allow you to access the Auth code tab, where you can customize your authentication even more. Clicking "Customize" on any Auth type will activate the Custom authentication. |
Pagination
Usually, in REST Components, when a get resource is consumed with no parameters received, a big number of paged data is returned. An example: instead of returning 1000 documents, what happens is that page 0 will contain 100 documents, page 1 will contain another 100, and so on.
That's why we have the optional “Pagination” tab, available when creating and/or editing REST applications, so you can inform which pagination type the application uses.
Default Parameters
The next step is defining what are going to be the default parameters in your Component. This step is optional. These are the permanent information within your requests, for instance, some querystring pattern or content type. The API's documentation will provide those.
The Default Params will be set to every Resource you build, so you don't need to register it in every Resource. Just set a default parameter and it will be replicated. You can choose between Querystring or Headers params.
By default, the results are returned in JSON format, however, if you need to receive them in XML, you can set this by adding a header type, choose Accept as the name and component/xml as a value, as shown below:

Resources
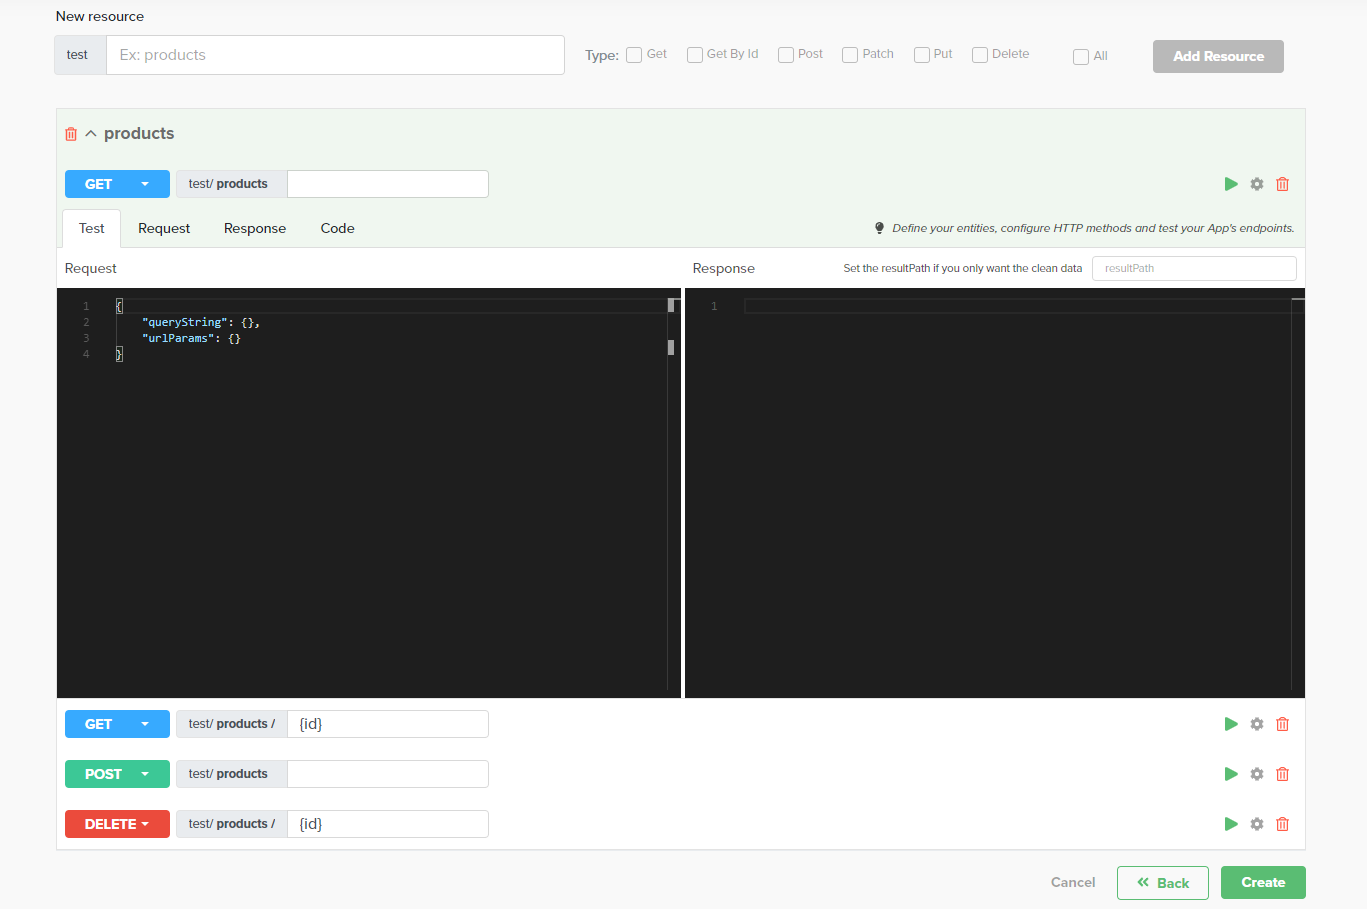
The final step is when you will define which Resources you are going to use. The LinkApi platform gives you the possible methods for each one of them (get, patch, delete, etc.) to reduce complexities. In order to execute the request, you have to set the credentials (in some cases, the API Key and the Component Key), and you can do this by clicking the message displayed in the upper left part (You can add auth params for test). This message will not show if you set the No Auth option.

Give the Resource a name, select its types and click Add Resource. The entity created will be displayed below, where you can open and set additional configuration, in the ⚙ Cog button.
The request tab’s purpose is to define what information the consumers of the API have to put in order to execute the request.
Response tab shows you how your Component will return the requested information to the user. Here, you can convert the received data to a table and define which ones are Unique Keys.
Code tab allows you to handle any exceptions you need to make within the default information coming from the API.
Updated over 6 years ago
